
zh-CN
Introduction
Coding on mobile just got easier! With Code-Server, you can set up a lightweight development environment directly in your browser—code anytime, anywhere, without the hassle of a heavy desktop.
Requirements:
Assume your situation:
- You have some technical knowledge.
- You can read documentation and debug by yourself.
- You enjoy tinkering with things.
Server (select one):
- Linux virtual machine on LAN
- Android phone on LAN
- Linux host on WAN
Client :
- Most graphical mobile devices that can run a general browsers.
Software:
- Code-Server
- UserLand App
- Ubuntu/Debian or other linux server os …
Why did REG think of this?
: Because of the iPad.
The iPad is not actually suitable for development, but sometimes REG needs to handle some lightweight coding tasks and doesn’t want to carry a heavy laptop around. If REG is stubborn, Apple would say: “If you’re willing to spend money, we will provide the best experience.” — Of course, there are useful editors and IDEs in the App Store, but most require payment and may have ads.
Clearly, REG doesn’t have too much money to let Apple exploit, but REG is not willing to accept reality. So…
!!! Thank you, open-source software !!!
Start
You should go here:
https://github.com/coder/code-server
The official documentation will be much clearer than what REG writes. REG only provides the methods REG has tested.
Manual Installation:
https://coder.com/docs/code-server/install
Deploy in an Internal Network (Universal):
Note:
You should not use this simple but unencrypted method in a public network.
Reference:
Deploy in a public network
Official documentation
Script:
sudo su # elevate privileges
cd /root
curl -fsSL https://code-server.dev/install.sh | sh
Edit Configuration:
nano /root/.config/code-server/config.yaml
Note: The path might be different; pay attention to the output during installation.
Recommended Configuration:
config.yaml
bind-addr: 0.0.0.0:8080
auth: password
password: 123456
cert: false
*Note:
0.0.0.0:8080 — listens on all addresses, port 8080
password: 123456 — Remember to change “123456” to your own password.
Run code server
after u saving your configurations just start with a simple command
sudo code-server
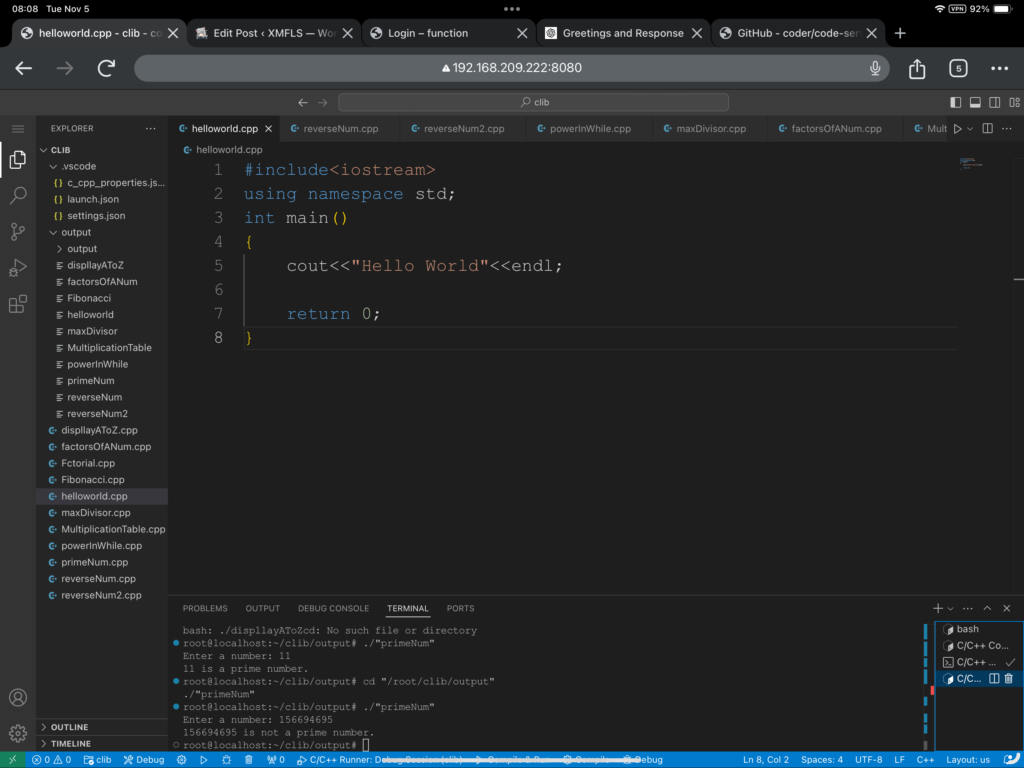
Access:
http://your_IP_address:8080
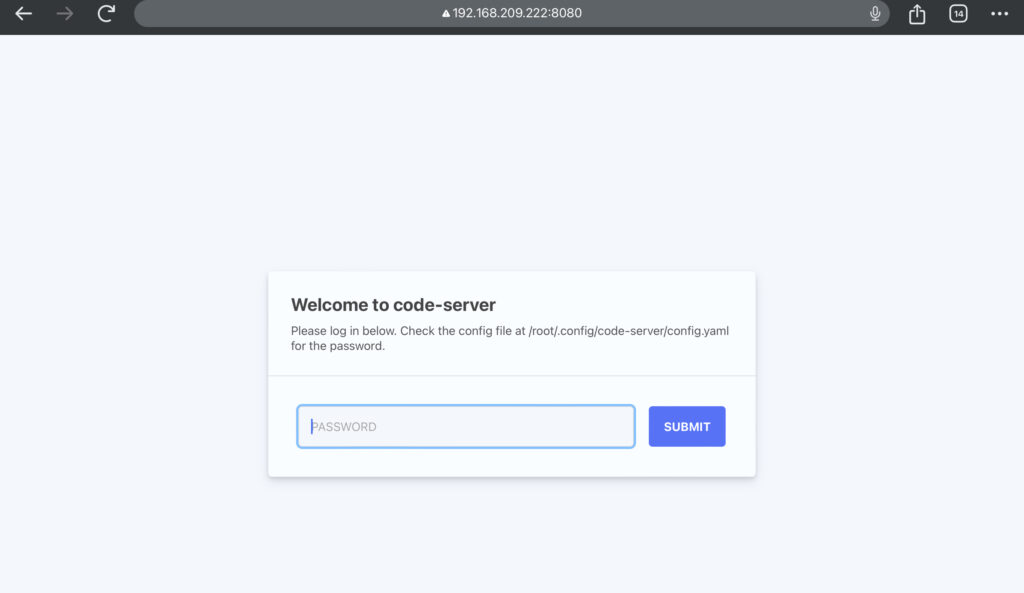
If REG’s internal network server address is 192.168.209.222
Then he/she should enter http://192.168.209.222:8080
Then — enjoy coding…
Android + UserLAnd Deployment:
Step 1: Download and Install UserLAnd:
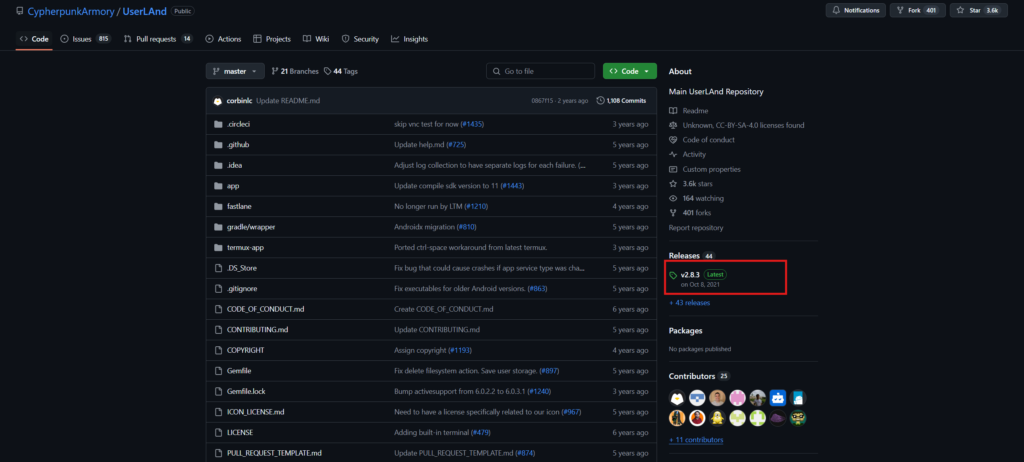
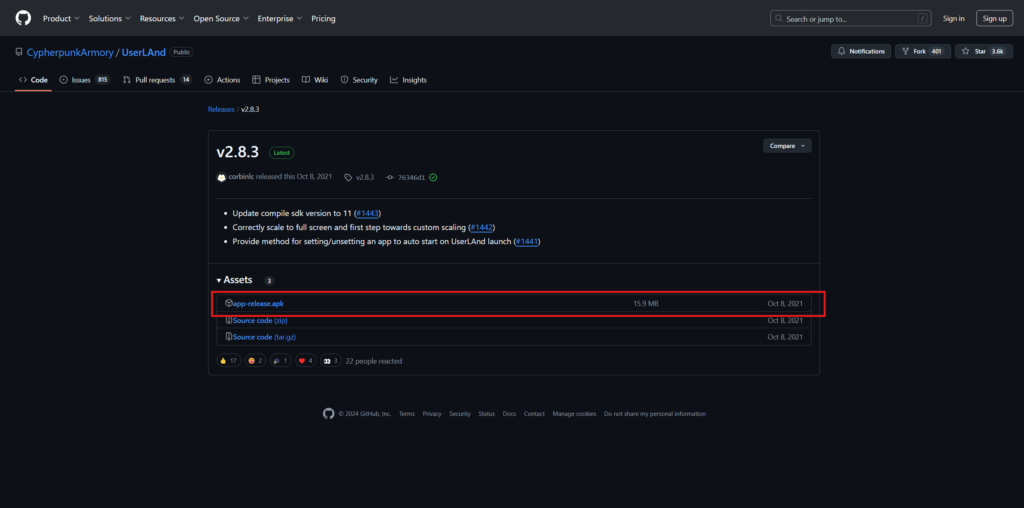
Github Releases:
https://github.com/CypherpunkArmory/UserLAnd
Google Play:
https://play.google.com/store/apps/details?id=tech.ula&hl=en_US
Documents and References:
https://github.com/CypherpunkArmory/UserLAnd?tab=readme-ov-file
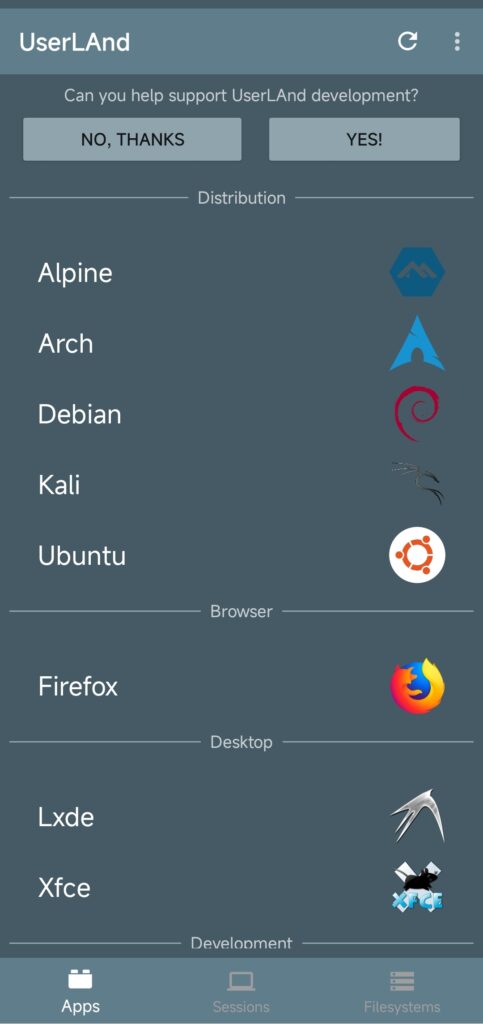
Step 2: Create File System and App
2.1 REG uses Ubuntu — Click here
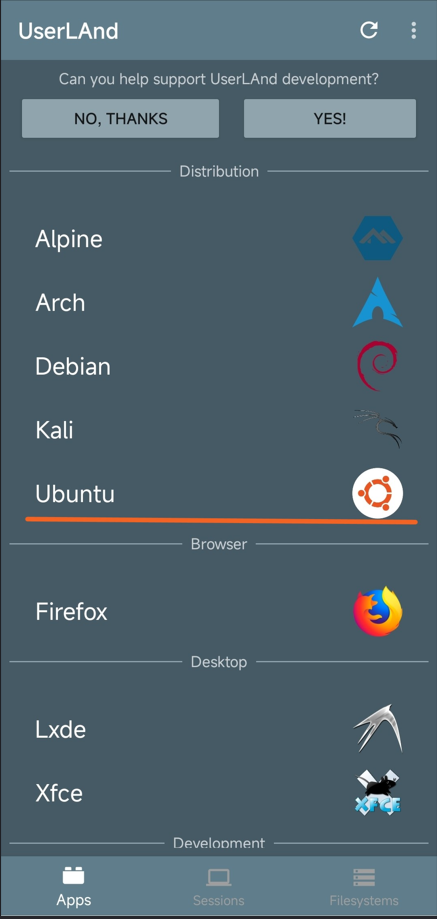
Of course, you can choose any Linux image you are familiar with.
2.2 Enter the information below — Username and Password (the following is an example)
NOTE: It is recommended to use the same password for both — easy to remember, otherwise it will be troublesome to forget.
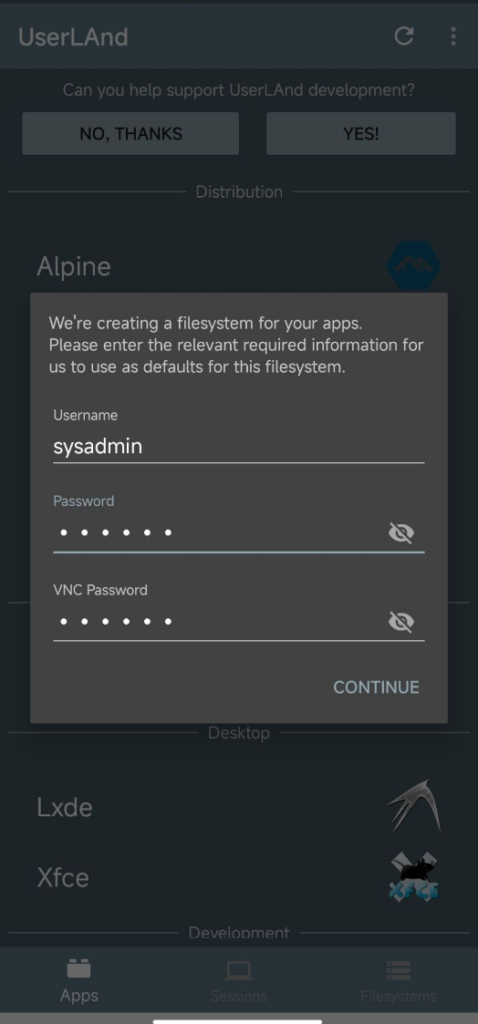
(Write down your password somewhere) — you will need it later.
2.3 Choose SSH
2.4 Then, there will be a long wait.
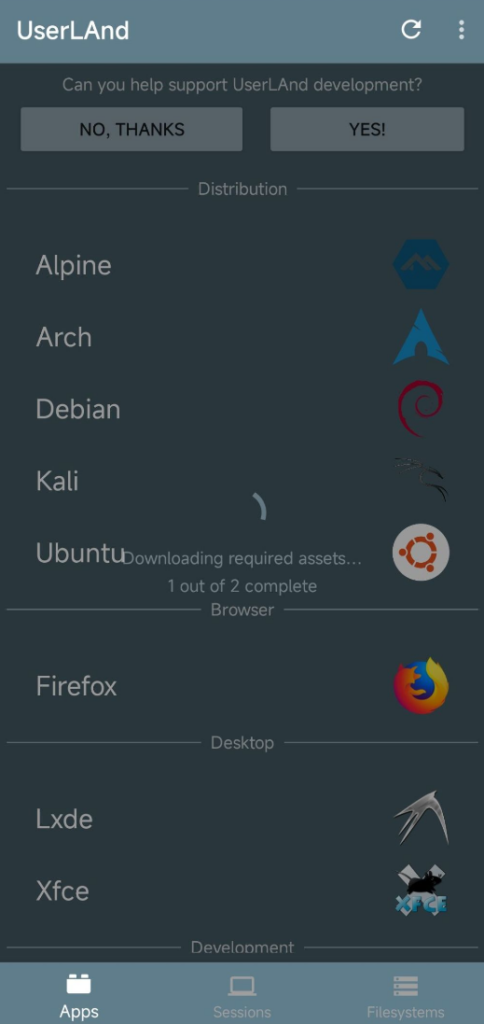
Hint: For friends in some regions, if it takes a long time at “Fetching asset lists…”, try the following:
- Use a proxy server
- Check the firewall
- Connect to a VPN
- “科学上网”
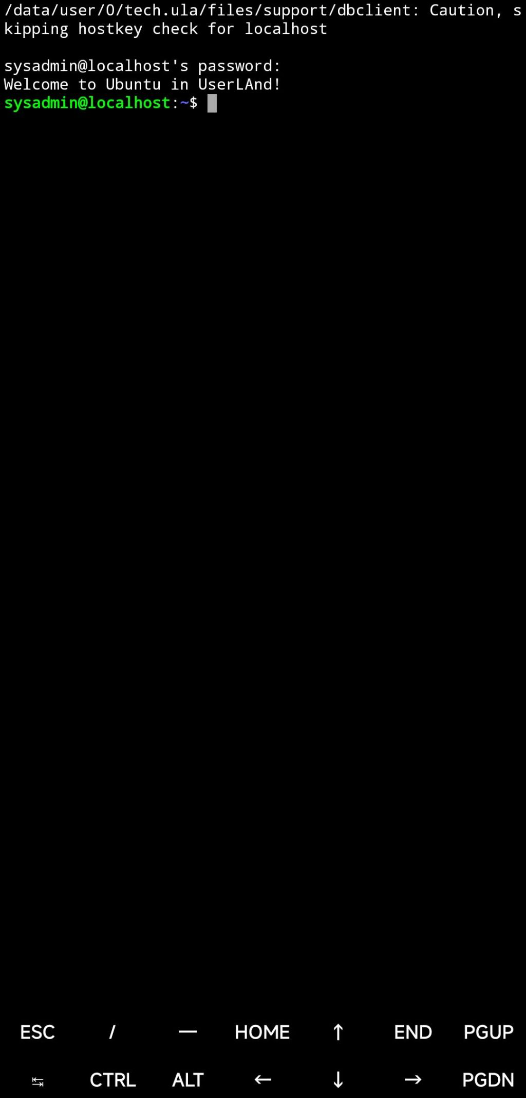
Step 3: Connect to Session
If everything goes well, you should see this screen:
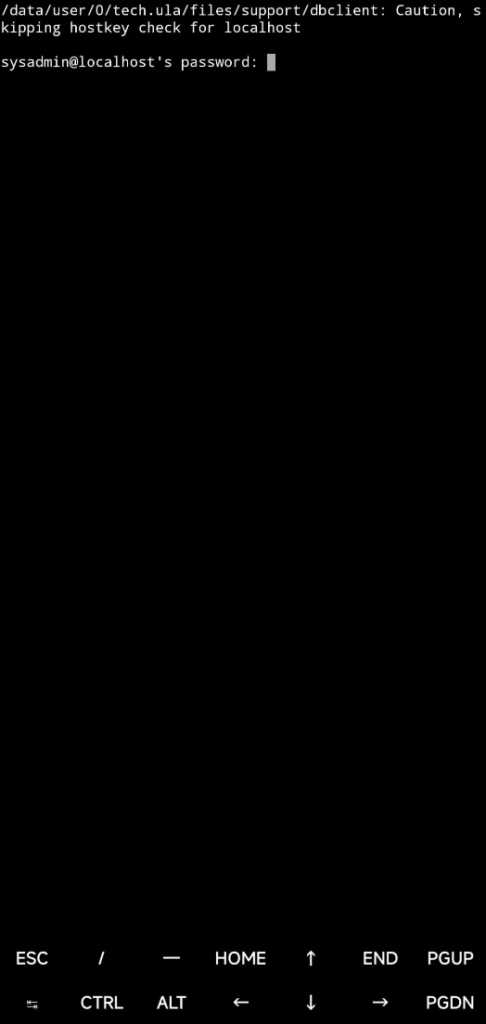
Enter the password you just wrote down.
What are you waiting for? Install the nano editor — a more user-friendly command-line editor.
su
apt update && apt install nano
If SSH is not needed, you can skip this step.
Install and Configure SSH
If SSH is not installed, try the following:
apt install openssh-server
Change the SSH configuration file
Usually found at /etc/ssh/sshd_config
nano /etc/ssh/sshd_config
Remove the “#” to uncomment.
Modify the port and allow root login. If login has issues, try editing:
PasswordAuthentication yes
PubkeyAuthentication no
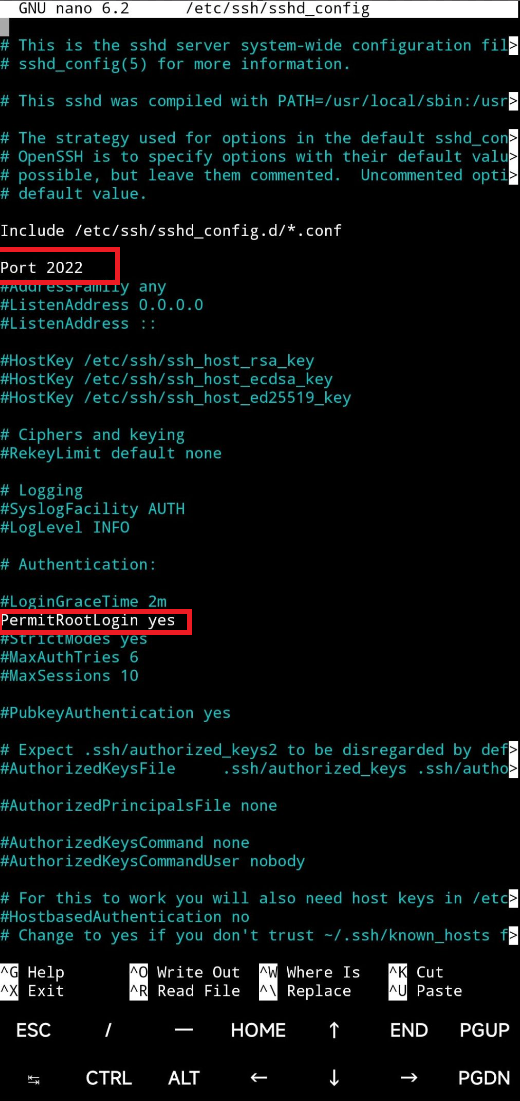
Press ctrl + s to save the configuration, then ctrl + x to exit nano — REG thinks nano is much better than vi for this.
Restart the SSH service
service ssh restart
After completing these steps, you can SSH into the Ubuntu image from the remote machine.
Then return to Deploying in the internal network (general)
Deploying in a public network
The parts involving encryption are usually more complex, so this section is aimed at advanced users.
Note
These configuration methods may not fully apply to your instance
They are only for reference
Assuming that:
- Your server has a public IP address, for example 111.222.333.444 (Note: this IP is not valid, but we use it for simplicity; replace it with your own later).
- Your server has NGINX installed, and ports 80 and 443 are open.
- You have a valid domain name, e.g., yourdomain111.com.
- You have a signed certificate for a subdomain of this domain (for code-server), e.g., code.yourdomain111.com.
Nginx Reverse Proxy
How does NGINX work in this scenario?
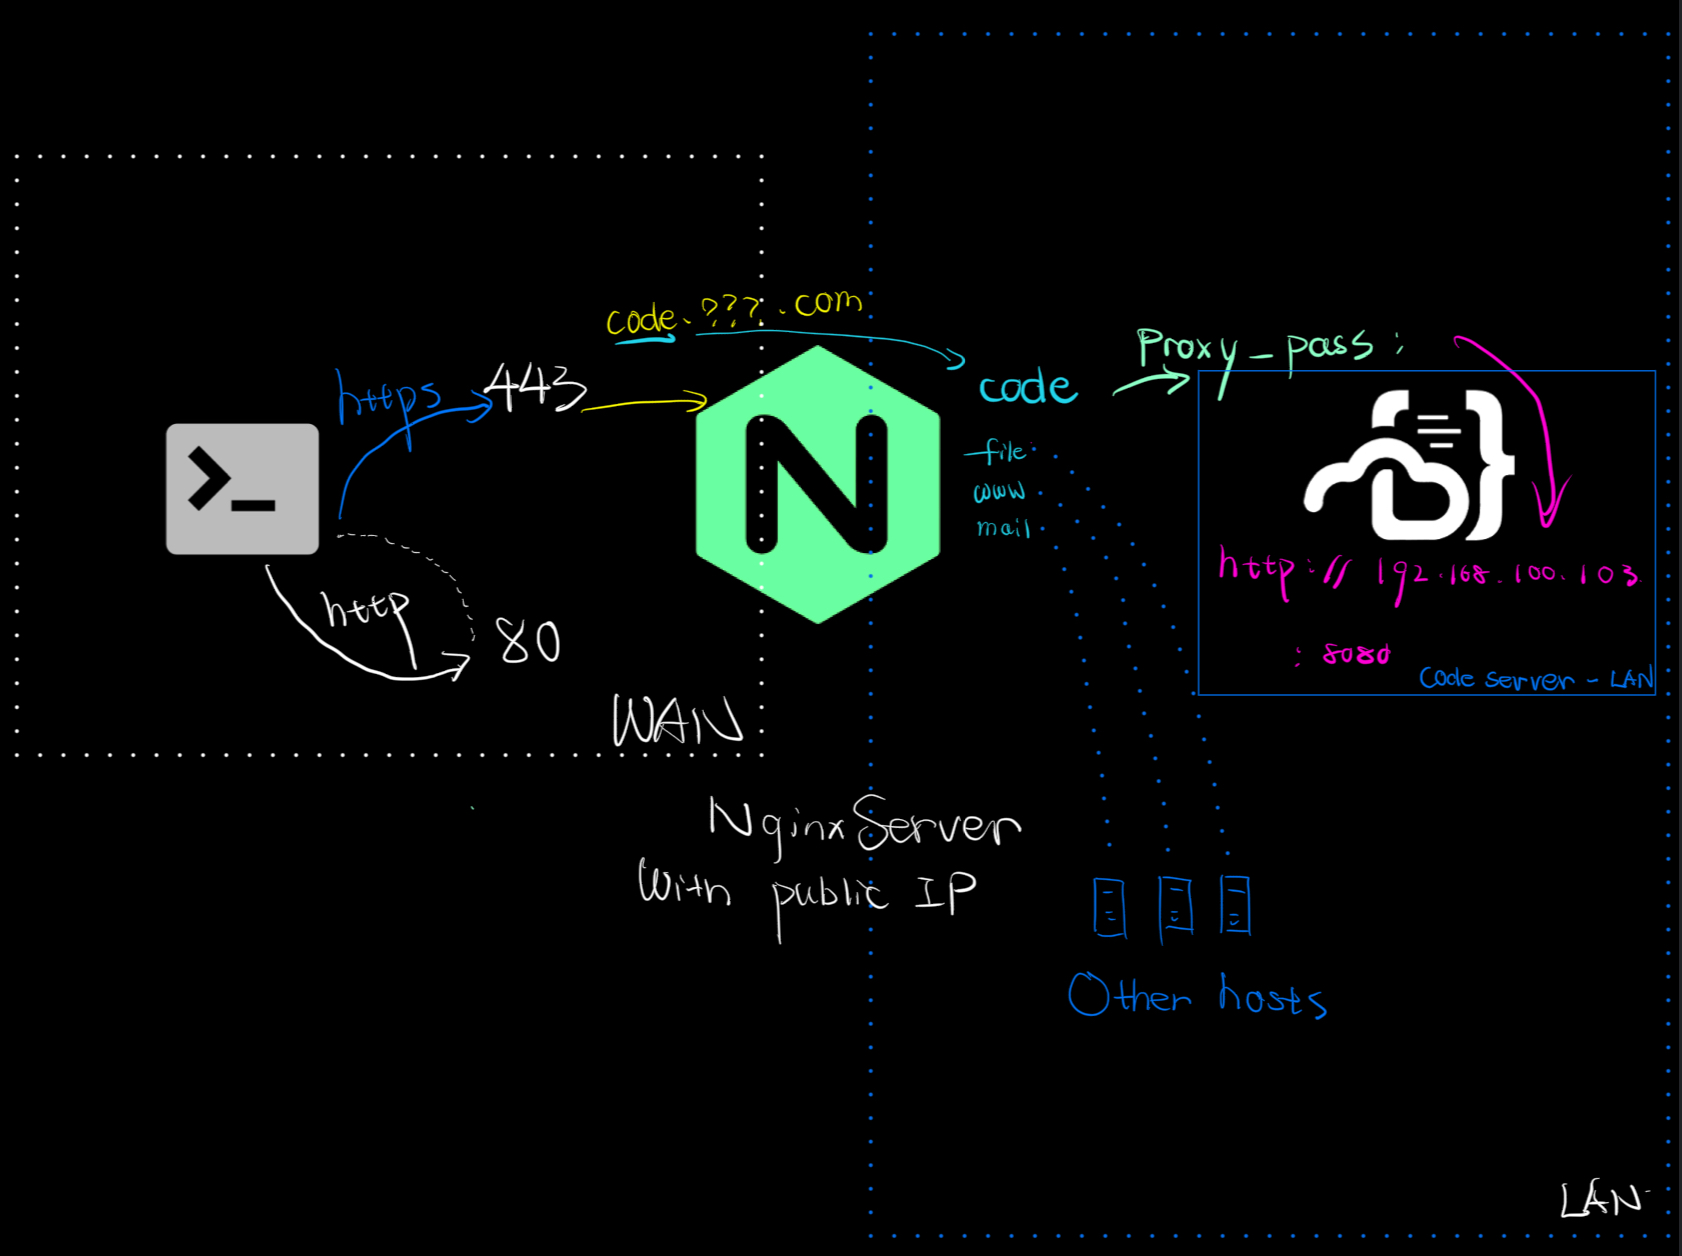
The client uses HTTP to request port 80.
A block in NGINX listening on port 80 redirects the request to HTTPS.
The client then re-requests port 443. NGINX detects the subdomain code.yourdomain111.com and matches it with the server_name for that domain.
Since we have configured proxy_pass under the code server_name,
NGINX forwards the request to the internal IP address 192.168.10.103 on port 8080.
Configure DNS Resolution
Add an A record for your subdomain (code) pointing to the public IP 111.222.333.444. The method may vary depending on the registrar; the example uses Cloudflare.
<!> NOTE: for cloudflare users plz disasble “Proxy status” while using this method.

Modify the code-server Configuration
bind-addr: 127.0.0.1:8080   # Ensure Code Server listens locally
auth: password              # Or "none" if using NGINX authentication
password: yourpassword      # Set a secure password
cert: false                  #  Make sure this is false if using NGINX SSL, or it might cause problems
Restart code-server
sudo systemctl restart code-server
Configure NGINX
Be sure to modify the parts marked with “#<!>”, and adjust other parts based on your actual situation.
General version:
user www-data;
worker_processes auto;
include /etc/nginx/modules-enabled/*.conf;
events {
    worker_connections 1024;
}

http {
    server {
        listen 80;
        server_name code.youdomain111.com; #<!>
        return 301 https://code.youdomain111.com$request_uri; #<!> # Redirect HTTP to HTTPS
        error_page 500 502 503 504 /50x.html;
    }
    server {
        listen 443 ssl;
        server_name code.youdomain111.com; #<!>

        ssl_certificate /etc/letsencrypt/live/example.com/fullchain.pem;  #<!>
        ssl_certificate_key /etc/letsencrypt/live/example.com/privkey.pem;  #<!>
        ssl_protocols TLSv1.2 TLSv1.3;
        ssl_prefer_server_ciphers on;

        location / {
            proxy_pass http://127.0.0.1:8080; #<!>
            proxy_http_version 1.1;
            proxy_set_header Upgrade $http_upgrade;
            proxy_set_header Connection "upgrade";
            proxy_set_header Host $host;
            proxy_set_header X-Real-IP $remote_addr;
            proxy_set_header X-Forwarded-For $proxy_add_x_forwarded_for;
            proxy_set_header X-Forwarded-Proto $scheme;
        }
    }

}
REG’s version
user www-data;
worker_processes auto;
include /etc/nginx/modules-enabled/*.conf;
events {
    worker_connections 1024;
}

http {
    server {
        listen 80;
        server_name code.youdomain111.com; #<!>
        return 301 https://code.youdomain111.com$request_uri;   #<!>     # Redirect HTTP to HTTPS
        error_page 500 502 503 504 /50x.html;
    }
    server {
        listen 443 ssl;
        server_name code.youdomain111.com;   #<!>

        ssl_certificate /path/to/your/fullchain.cer;   #<!>
        ssl_certificate_key /path/to/your/code.yourdomain111.key;   #<!>

        ssl_session_cache shared:SSL:1m;
        ssl_session_timeout 5m;

        ssl_ciphers HIGH:!aNULL:!MD5;
        ssl_prefer_server_ciphers on;
        # proxy_set_header X-Forwarded-Proto $scheme;
        fastcgi_hide_header X-Powered-By;
        fastcgi_buffers 64 4K;
        client_max_body_size 0;
        client_body_buffer_size 512k;
        http2_body_preread_size 1048576;
        fastcgi_request_buffering off;
        proxy_read_timeout 86400s;
        location / {
            proxy_pass http://127.0.0.1:8080;   #<!>
            proxy_set_header X-Forwarded-For $proxy_add_x_forwarded_for;
            proxy_set_header X-Forwarded-Port $server_port;
            proxy_set_header X-Forwarded-Scheme $scheme;
            proxy_set_header X-Forwarded-Proto $scheme;
            proxy_set_header X-Real-IP $remote_addr;
            proxy_set_header Accept-Encoding "";
            proxy_set_header Host $host;
            fastcgi_hide_header X-Powered-By;
            fastcgi_buffers 64 4K;
            client_max_body_size 0;
            client_body_buffer_size 512k;
            #http2_body_preread_size 1048576;
            fastcgi_request_buffering off;
            proxy_read_timeout 86400s;


        }
    }

}
After editing, don’t forget to reload NGINX.
sudo nginx -s reload
Access
Enter the following in your browser:
https://code.yourdomain111.com
or
http://code.yourdomain111.com
The Bottom Line
REG hope this article has provided you with useful information. If you have any questions or suggestions, feel free to leave a comment below.
Thank you for reading,
and stay tuned for more content!
<!> Reprinting is allowed only with proper attribution to the original source